Stevens RoBoat
Stevens RoBoat is my capstone / senior design project at Stevens Institute of Technology. A full year, collaborative design and execution project, myself and a team of three colleagues are building an autonomous surface vehicle – a boat that can navigate autonomously between waypoints, avoiding obstacles along its path.
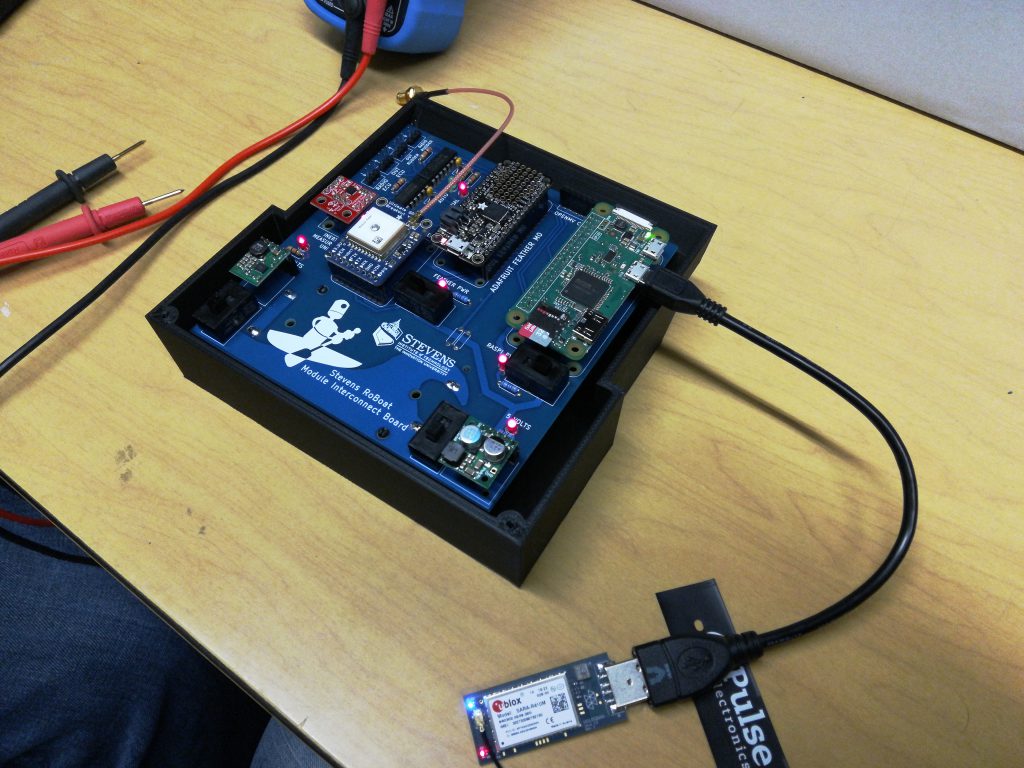
For RoBoat I have been principally involved in electrical and firmware design; I reverse engineered the control signals of an off-the-shelf RC speedboat, designed firmware that would generate these control signals automatically, and designed a hardware interface for an ARM microcontroller to allow us to control the boat autonomously while allowing a fail-over to the stock remote control. I was involved in porting sensor interfacing firmware from an AVR platform to an ARM platform, and writing firmware for the control loops the boat uses in its autonomous navigation. I designed the power subsystem for our controller and performed schematic capture and circuit board layout to move the prototype design from a breadboard to an integrated circuit board.
Details of the RoBoat project can be comprehensively found at the project website.
Wave Player
An idea I’d toyed with a number of times over many years; a small but versatile embedded sound player for use with props, cosplay, and -frankly- anything that needs high quality sound in a small, low power form factor. There are certainly modules on the market that can play sound files from an SD card without taking up too much space or draining a battery, but they often require an external processor (often an Arduino in the hobbyist and cosplayer communities) that makes such qualities moot. This player can have its firmware easily customised to perform many tasks, from simply playing music or ambient noise on repeat, to long custom sequences triggered by external inputs.
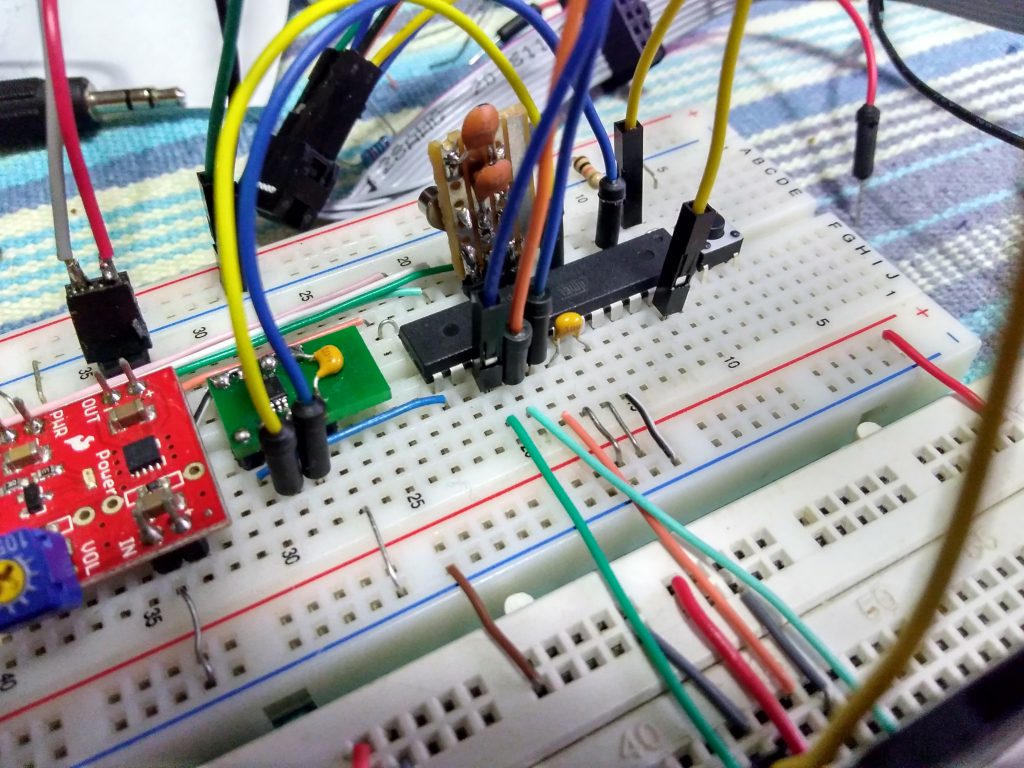
My prototype hardware was developed on a breadboard, beginning simply with writing a driver for the digital to analog converter and producing stored waveforms. I proceeded to integrate an audio amplifier to drive an 8 ohm speaker, and finally ported the excellent FatFS library to interface with a FAT filesystem on the SD card. I was quickly able to implement firmware that played 16 bit, 44.1 kSample/s (CD quality) wave files. This firmware was then overlaid with a control program that is easily editable and allows the player to act appropriately for the use case. For instance, in a sci-fi prop a sound could be triggered to play whenever a button is pressed, or in a more complex setup a more involved set of rules could be used to trigger specific sounds under certain circumstances – the possibilities are quite endless.
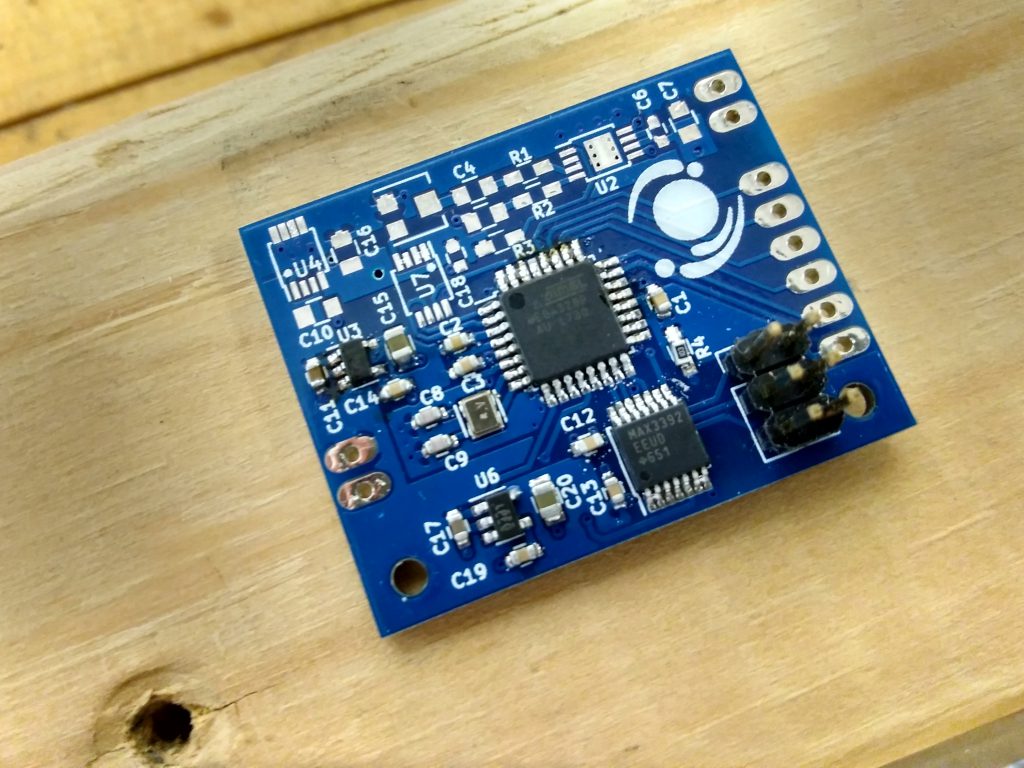
The final circuit board design features separate power domains to isolate digital switching noise from the analog audio signal, an easy access programming header, microSD slot onboard, onboard trimpot to set the audio volume, convenient wiring pads for the power and speaker wires, and six general purpose input/output pins for application use. This means that the module can not only accept inputs for sound triggering, but can output digital signals in addition to audio, again with maximum flexibility in mind.
3D Printed Enclosure
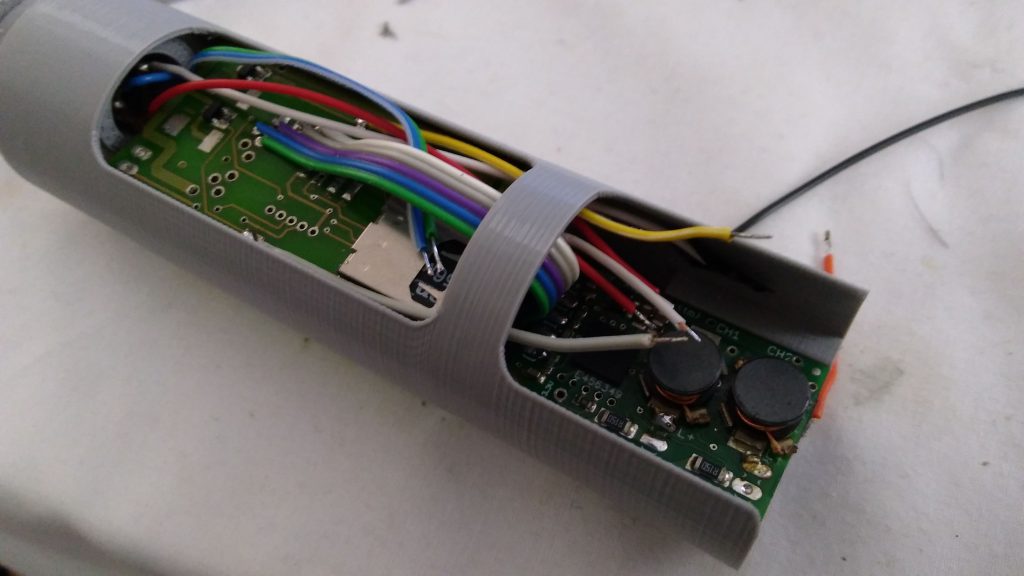
Putting together a replica lightsaber prop for Star Wars cosplay, I needed a reliable way to hold the electronics inside the prop securely and neatly, while retaining the ability to remove everything as a single unit so as not to stress wiring connections etc. I designed and 3D printed this enclosure that performs a number of tasks; it holds two lithium-ion batteries, a recharge and a data port, and two electronic boards that provide light and sound effects, it insulates the electronics from the metal of the prop body, and provides a mechanism whereby the prop can be easily maintained by removing the electronics as a single piece, allowing, for instance, easy access to a microSD card storing the prop’s sound files. The enclosure was designed in Autodesk Fusion 360.
Flash Driver
As a young teenager I learned electronics by solving niche problems in the prop replica community, and Flash Driver is one such solution. It uses a very low power PIC microcontroller to sense two things: when a high power LED is turned on, and when an impact sensor is triggered. When it senses these simultaneously it briefly powers a secondary high power LED. The module was used by people building custom lightsaber replicas who wanted their blades (diffusing tubes lit by a ~3 watt LED) to briefly flash yellow or white on impact, replicating the special effects used in the Star Wars films. This module provided people with only a scarce knowledge of electronics the ability to produce much more accurate looking replicas, all by solving a simple sensing problem.